 Step by Step Guide
 How to clean your car interior from top to bottom
Clean a car interior in the right order without damaging plastics, upholstery, leather, glass, or carpet, and remove the source of lingering odors instead of masking them.
Updated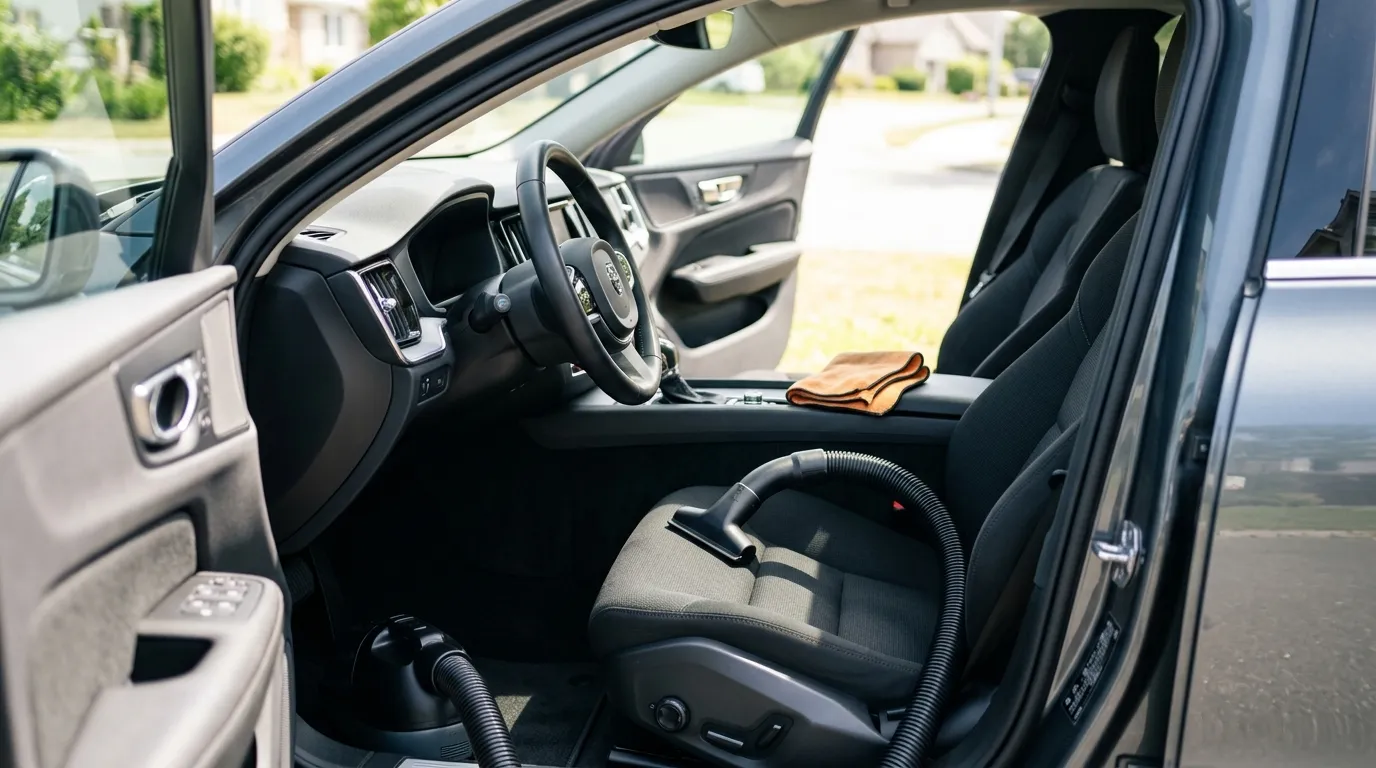
The interior is the part of the car you actually live with. Hands touch the wheel and controls, crumbs settle beside the seats, and wet shoes leave moisture in the carpet. A quick wipe can make the cabin look better, but cleaning in the wrong order often spreads dust, leaves greasy glare, or traps dampness under the seats.
This guide follows a simple sequence: empty first, remove dry dirt from top to bottom, use as little moisture as each material needs, and clean glass near the end. Set aside about ninety minutes for a well-kept car and more time if stains or pet hair have accumulated.
Work in the shade with the engine off, provide ventilation, and read every product label. Never mix cleaners, spray liquid into switches or vents, or apply a product to leather, a touchscreen, or tinted glass unless it is suitable for that surface. Test an inconspicuous area first.
Empty the cabin completely
Remove trash, personal items, floor mats, child-seat accessories, and everything stored in door pockets, the console, glove box, and trunk area you intend to clean. Sort belongings into what returns to the car, what belongs elsewhere, and what can be discarded. Keep vehicle documents in a safe, dry place.
Move the seats through their normal range so you can see what has collected around the rails, but keep fingers and loose objects away from the mechanism. Check under seats for coins, cables, sharp fragments, and food before using the vacuum. Large objects can block the hose, while broken glass should be handled carefully with sturdy gloves.
Loosen and vacuum dry dirt from top to bottom
Start with a dry soft brush on vent louvers, seams, buttons, and seat stitching. Hold the vacuum nozzle nearby so loosened dust is captured instead of settling elsewhere. Avoid pressing a hard plastic nozzle against delicate trim, headliner fabric, screens, or glossy surfaces that scratch easily.
Vacuum the upper areas first, then the seats, seat gaps, rails, storage pockets, and finally the carpet. Slide and recline the seats only as the vehicle permits. On cloth upholstery and carpet, short strokes in different directions lift embedded grit better than one fast pass.
Wipe the dashboard, controls, and hard trim
Fold a clean microfiber cloth into quarters so you can switch to a fresh face as it becomes dirty. Apply a small amount of diluted mild cleaner to the cloth, not directly to the dashboard. Wipe one section at a time and follow with a dry cloth so no liquid collects in seams.
Use a barely damp brush or cotton swab around textured controls, then wipe away residue. Give extra attention to the steering wheel, shifter, door pulls, seat-belt buckles, and other frequent touch points. Do not make the wheel, pedals, or shift control slippery with dressings.
Clean cloth seats with minimal moisture
Vacuum the seat again after brushing the seams. Test the chosen upholstery-safe solution on a hidden spot and wait long enough to check for color change. Apply it lightly to the cloth or brush rather than soaking the cushion, then work a small section with gentle, overlapping strokes.
Blot with a clean towel to lift moisture and soil. When treating a visible stain, feather the damp cleaning area outward or clean the entire panel evenly so a hard water ring does not form. Two light treatments are safer than one saturated attempt, especially on foam-backed seats.
Clean and condition leather correctly
First determine whether the surface is genuine coated leather, synthetic upholstery, suede-like material, or a combination. The owner’s manual may identify it. A product intended for one material can stain another, so test a hidden area and follow the label rather than relying on appearance alone.
Remove dust with a soft vacuum attachment, then wipe using a microfiber cloth lightly dampened with a compatible cleaner. Work gently around perforations and stitching, where liquid can enter the padding. Dry the surface promptly and do not scrub away the protective finish.
Wash the mats and refresh the carpet
Shake or tap loose grit from each mat outdoors, then vacuum both sides. Wash rubber mats with mild soap and water, rinse them, and let them dry out of harsh direct heat. Treat fabric mats like the seats: brush, use limited moisture, remove residue, and allow enough drying time.
Back inside, agitate the floor carpet with a soft brush and vacuum again, concentrating near the pedals and beneath the seat tracks. Do not soak wiring, electronic modules, or connectors that may sit under the carpet or seats. If you find unexplained dampness, investigate a leaking seal, drain, or heater system rather than covering it with fragrance.
Never reinstall a damp mat. Moisture trapped in a closed cabin encourages musty odor and window fogging. Confirm that the driver’s mat uses its proper anchors and cannot bunch up or slide toward the pedals.
Clean the inside of every window
Glass comes near the end because earlier dust and cleaner mist can land on it. Spray ammonia-free glass cleaner onto a dedicated microfiber cloth, not toward the dashboard or window switches. Wipe the windshield, side glass, mirrors, and rear glass in manageable sections, then buff with a second dry cloth.
Use horizontal strokes inside and vertical strokes outside, or reverse that pattern, so a remaining streak immediately tells you which side needs another pass. Lower the side windows slightly to clean the upper edge, then raise them and finish the rest.
Find the odor source and let the cabin dry
Smell is evidence, so trace it before adding fragrance. Check beneath seats, inside storage areas, around cup holders, under the trunk floor, and in damp carpet. A stale odor from the vents may point to a cabin air filter or moisture problem that should be handled according to the maintenance schedule.
Remove and clean the source when it is safe to do so, then ventilate until every treated surface is dry. Persistent mold, fuel odor, exhaust smell, or signs of a fluid leak require proper diagnosis. Do not keep driving with fumes or try to disguise them with an air freshener.
Return only the items the car needs, secure loose objects, reinstall completely dry mats on their anchors, and make sure seats and belts operate normally. A light neutral cabin is the goal; fragrance is optional.
Common mistakes
- Wiping before vacuuming. Loose grit becomes muddy residue and can leave fine scratches on trim.
- Spraying controls directly. Liquid can run through gaps and damage electronics or leave sticky buildup.
- Using one cloth everywhere. Dashboard dressing and upholstery soil then end up smeared across the glass.
- Soaking seats and carpet. Deep foam dries slowly and can develop a persistent musty smell.
- Leaving the driver’s mat unsecured. A moving mat can interfere with pedal travel.
Keep the result with a short routine
Remove trash weekly, shake out the mats when they collect grit, and wipe fresh spills before they soak in. A quick vacuum and touch-point wipe every couple of weeks prevents the next deep clean from becoming a major project.
More product does not mean a cleaner car. Careful dry removal, surface-compatible solutions, separate cloths, and complete drying deliver a safer, calmer interior that stays clean longer.
Frequently asked questions
Can I use a household all-purpose cleaner on the dashboard?
It is safer to use a mild product suitable for the surface. Strong household cleaners can discolor or soften automotive plastics. If you have no alternative, dilute well, test a hidden spot, and never assume it is safe for leather or screens.
How do I keep the inside of the windows from fogging?
Remove the oily film with a clean microfiber cloth and ammonia-free glass cleaner, then address trapped moisture. Dry wet mats and carpet, check for leaks, and use the vehicle's defogging system when needed.
Should I use an air freshener after cleaning?
Only if you want one after the odor source is gone. Fragrance cannot fix damp carpet, spilled food, or a saturated cabin filter. Find the source, clean it, let everything dry, and then use scent sparingly.
How often should I deep-clean the interior?
Every three or four months is a useful starting point for normal use. Between deep cleans, remove trash weekly and vacuum high-traffic areas or wipe touch points every couple of weeks.
Informational content. For risky situations or technical, legal or medical doubts, talk to a professional.