 Step by Step Guide
 How to do a basic car check yourself, in 15 minutes
The maintenance checklist you can do at home: checking oil, coolant and fluid levels, tire pressure and wear, lights, wipers, battery and air filter — and knowing when the problem is a job for a mechanic.
Updated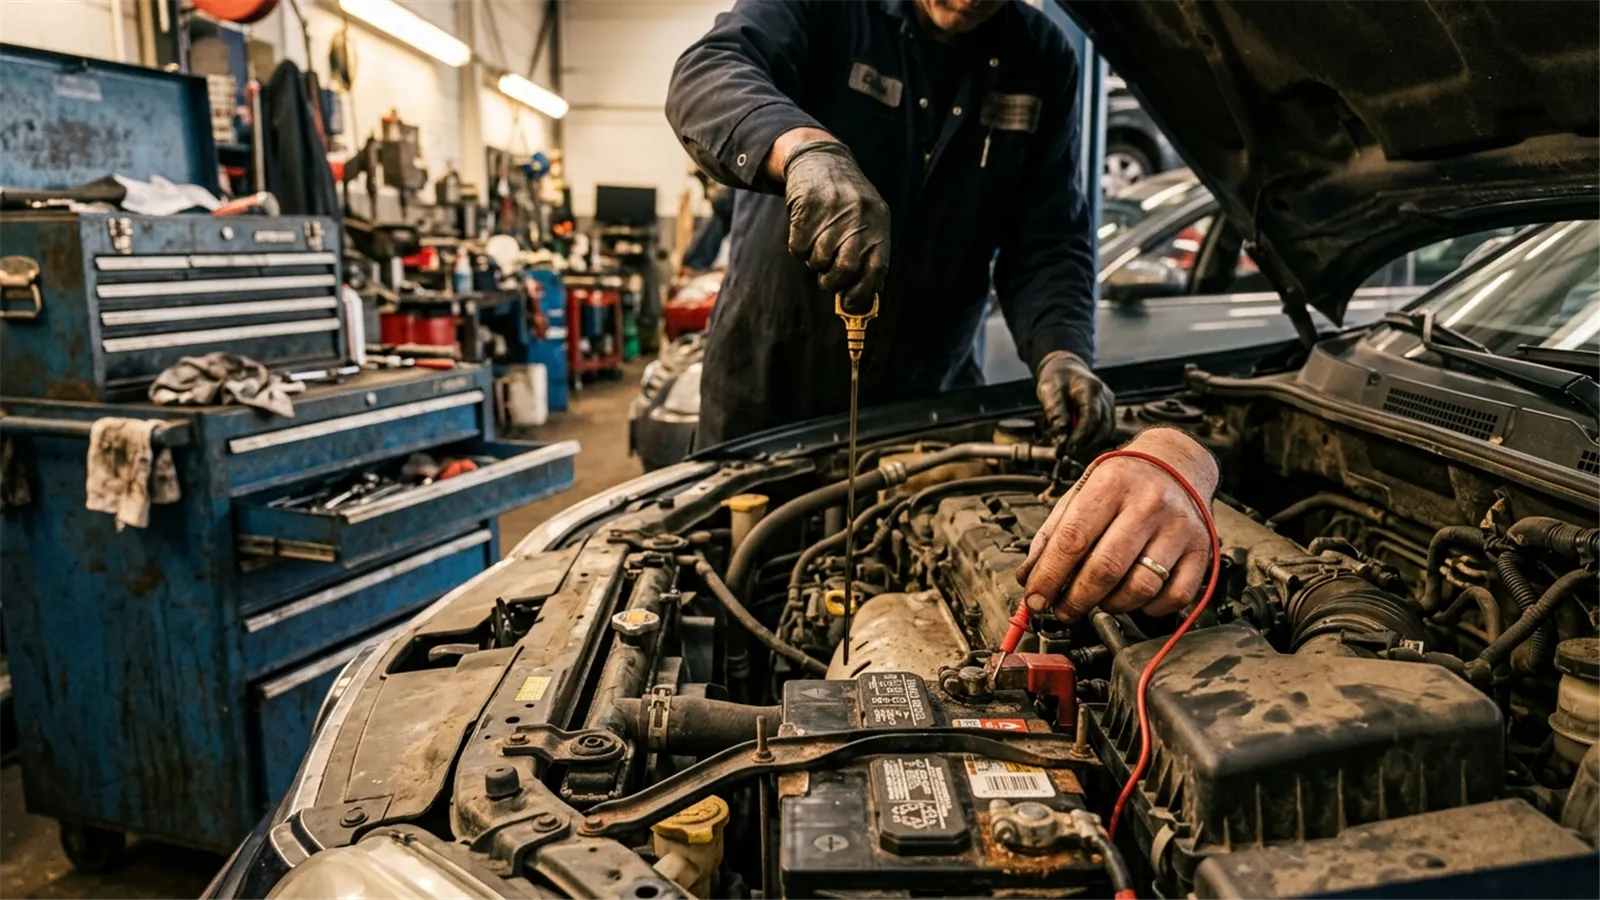
A basic checkup is nothing more than finding a small problem before it becomes an expensive one. A car that gets a quick inspection once in a while breaks down far less often, and most of these checks need neither a mechanic nor any special tool — it’s look, measure, and draw a conclusion.
This guide covers ordinary passenger cars with a gas or diesel engine. If you drive an electric vehicle, the logic for tires, lights and wipers is the same, but the oil part goes away and the coolant section shrinks to just the cooling fluid and brake fluid. And if you’ve never done this before, do the first one at a shop or gas station while following along with the mechanic — after that, you’ll handle it on your own.
Safety first: never check a fluid with the engine hot, and never put your hands near moving parts. Work on level ground with the parking brake set and the transmission in Park (or first gear on a manual). When you prop the hood, lock it in place with the rod — never trust it to stay up on its own weight.
Before you start
Gather what you need before you head out. It’s not much, but each item saves a pointless trip to the store.
- Owner’s manual: the oil viscosity, the spot for each reservoir and the tire pressures are all in there
- A clean rag, to wipe the dipstick and the caps
- A tire pressure gauge (analog or digital)
- Distilled water or replacement coolant, whatever your manual calls for
- A flashlight (your phone works) to see the fluids in a dark engine bay
- A notepad or your phone to jot down what needs attention next time
Check the engine oil level
Do this with a cold engine. If you’ve just been driving, wait about ten minutes with the engine off so the oil can drain back to the pan — reading oil while it’s hot gives you a false level.
Open the hood and find the dipstick, usually a yellow or orange loop. Pull it out, wipe it with the rag, push it all the way back in, and pull it out again. The level should sit between the min and max marks — the closer to max without going over, the better.
Also look at the color of the drop on the rag. Caramel-brown oil is normal. Black and sludgy oil means it’s old or the change interval has come and gone. Oil that looks like coffee with cream or milky is a sign of water in the pan, which usually points to a head gasket — that’s a shop visit, and not a delayed one.
Check the coolant level
The coolant reservoir is a translucent plastic tank near the radiator, with min and max lines molded right into the plastic. Cold engine, the level should sit between the two.
Never, and I’ll repeat it, never open the radiator cap while the engine is hot. The fluid is under pressure and the first thing it does is scald your face. With the engine cold and the level below min, top up with the mix your manual specifies — in most cases half distilled water and half coolant. Topping up with plain water every time is the fastest way to rust out the cooling system.
If the level keeps dropping, hunt for the leak: rust on the hoses, colored residue under the engine, or that sweet coolant smell. A coolant leak doesn’t wait around — it leads straight to an overheating engine.
Check the brake, power steering and washer fluids
The brake fluid is the one that matters. Its reservoir is small, sits under the hood and has min and max lines. The level drops a little as the brake pads wear, which is normal, but if it drops fast you’re looking at a leak or a bigger problem. Always use the fluid your manual specifies — DOT 3, DOT 4 or DOT 5.1 — and never just “whatever.”
Also check the washer fluid reservoir and, if your car has hydraulic power steering, that reservoir too. These are usually topped up with plain water, no mix, but confirm in the manual. A low washer level is only an annoyance; a low brake fluid level is a serious thing.
Check tire pressure and inspect the tread
Check pressures cold, ideally before you head out, with the tires at rest — never right after driving. The correct pressure is on the sticker on the driver’s-side door jamb or in the manual, not on the sidewall of the tire, which only lists the max load and speed rating.
Check all four tires plus the spare, then walk around and look at the tread. Even wear is healthy. Heavy wear on both edges means low pressure. Wear only in the center means overinflation. One-sided, patchy wear means the alignment or the suspension is off. And remember: 1.6 mm of tread depth is the legal minimum — a bald tire won’t hold the car on a rainy road.
Test the lights and wipers
Use a closed garage or an extra set of eyes: switch on the low and high beams, the running lights, the turn signals, the reverse light and the brake lights. A burned-out headlight isn’t just a ticket — it’s your vision at night. It takes a couple of minutes and saves you a scare.
Turn on the wipers and spray the washer fluid. If the spray is weak or stutters, the reservoir is empty or the nozzle is clogged. While you’re at it, run a finger over the wiper rubber: if it’s stiff, cracked, or leaving a visible streak of water, replace the blade. Bad wiper blades scratch the windshield and ruin visibility in the first rain.
Give the battery and air filter a look
The air filter is a plastic box with a housing, usually near the engine, held by clips or a few screws. Pull the filter out and hold it to the light: if it’s pale and airy, it’s fine; if it’s dark and caked with dust, replace it. A combustion engine lives on clean air, and a dirty filter costs you power and economy.
For the battery, the test is visual: clean terminals, free of that white or green fuzz (if it’s there, scrub it off and coat the terminals with a little grease or petroleum jelly), firm cables with no play. If the car has started being fussy about cranking in the morning but starts fine the rest of the day, the battery is signaling the end of its life.
Record it, and compare next time
Write down the date, the mileage, each tire’s pressure and what you noticed. That checklist line is your memory. Next time around you compare against the last one and spot something that’s slowly getting worse — which is how problems usually show up, so gradually you almost don’t notice.
If you saw that the oil is dark or the filter is caked, the checkup has turned into maintenance, and that’s fine — that’s the point. If everything is within normal, you can head off on that trip with a lot less worry.
Common mistakes that cost money
- Checking with a hot engine. The oil reads “spread out” and lies to you; hot coolant is a burn waiting to happen.
- Just topping up and never finding the problem. Topping off a level is a band-aid. If it’s dropping, what matters is the leak or the burn.
- Checking tire pressure after driving. The reading runs high with heat, so you inflate less than you should.
- Forgetting the spare. It ages and loses pressure just like the others, and it’s the tire that saves the day.
- Treating the checkup as an excuse to only change oil. Inspecting doesn’t replace changing. The checklist finds the problem; the change fixes it.
When a basic checkup isn’t enough
Some signs are a warning that the problem is bigger than your checklist, and the right move is to head to a shop instead of pressing on:
- A red warning light on the dash (oil, battery, brake or temperature) — not the time to keep driving and do research
- A coolant leak, or a level that drops too fast
- Milky-looking oil, or a sweet coolant smell inside the cabin
- Noise or a mushy brake pedal, or pads at the limit
- Steering-wheel vibration that won’t go away with a pressure check, or serious one-sided tire wear
- An engine that shakes, misses, or loses power on a hill
Notice any of these? Stop tending to the car yourself and take it to someone with the tools and experience. The good news is that a basic checkup catches most problems while they’re still affordable — that’s exactly the kind of preventing that avoids the big bill down the road.
Frequently asked questions
How often should I do this basic checkup?
Every month or two, and always before a long road trip. The safety items — tires, brakes and lights — deserve a monthly look, while oil and the air filter follow the interval in your owner's manual. The goal is to build a routine so you don't find the problem on the side of the highway.
Can I top up the oil with a different brand?
For a small top-up in an emergency, yes — as long as it's the same type and viscosity, for example 5W-30 mixed with 5W-30. Blending brands every now and then won't hurt anything; blending different types is what creates sludge. If you've had to add more than a quart between oil changes, there's a leak or an engine burning oil — time to see a mechanic.
What do I do if the coolant level dropped a lot?
Never open the radiator cap while the engine is hot — the fluid is pressurized and will scald you. Let it cool, top up to the minimum line with the mix your manual calls for (usually half distilled water and half coolant), then hunt for the leak. If it dropped suddenly or you're topping it off every week, head to a shop without driving far.
Does a dirty air filter really make a difference?
It does. A clogged filter restricts air intake, the engine loses power and fuel economy drops — the car feels sluggish and you can't figure out why. It's a cheap change, and on most cars it takes a couple of minutes. If the engine lost its pep and the mileage suddenly dropped, the filter is one of the first suspects.
Informational content. For risky situations or technical, legal or medical doubts, talk to a professional.